This article has now been deprecated. The information in it is still accurate, however since version 2.1.0, Talkatoo automatically integrates with the SpeechMike. If you need more customization options, then this article will still be helpful. Otherwise it's recommended to refer to this article instead.
The Speechmike series are extremely customizable, and while we won't cover everything here, feel free to get in touch with our support team to discuss any additional questions you have regarding the setup.
Here is a video on the process of downloading, installing and configuring your SpeechMike microphone. If you'd prefer written instructions, continue scrolling past the video.
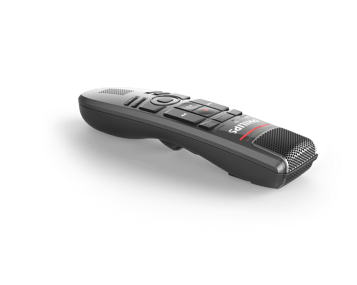
Out of the box, the microphone will work as both a microphone, and a mouse (trackpad and buttons) just by plugging it in. See here for instructions on pairing if you purchased the wireless SpeechMike Air SMP4000.
The real benefit from this microphone comes from programming the buttons to further speed up your dictation, and control your computer. These additional functions can only be accessed by installing the Philips SpeechControl software.
Once you are on the website, scroll down to the Software and Drivers section, and click the SpeechControl driver and configuration software for Windows.
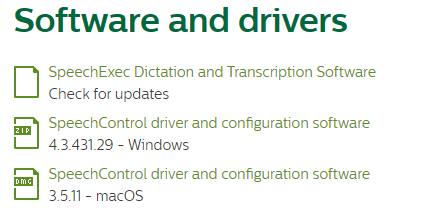
For this example, I am using the SpeechMike Air, but the software download link, and the configuration process is identical for the wired 3700.
Once you have downloaded and installed the software, launch it and ensure you see your microphone listed like below - plug it in now if you have not yet done so.
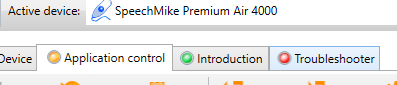
Click the Application control tab to begin setting up your microphone.
There will be some defaults, but for the most part they will not be applicable to Talkatoo.
Note: If you have been sent a pre-configured XML file (generally called something like Talkatoo_config.XML or app_config.XML) this is where you would want to import it. Click here for instructions on importing this file.
Press once vs Press and hold
You will notice that there are 2 columns for each preset: Pressed and Released. This means that you can set different options for pressing and holding, and for releasing the button. The most common use for this is pressing the Record button once to turn Talkatoo on, speaking, then pressing it again to turn it off vs pressing and holding it while speaking, and then releasing it. This is purely a preference, though if you are using the press and hold method, ensure you allow Talkatoo to finish transcribing your text before releasing the Record button.
Important - Check Windows Audio Levels
If you are using Windows, we have found that sometimes the input level is set to 0 or 100. If you find your voice is not being heard, or is not very accurate, adjust your microphone to approximately 40 (lower if the environment is noisy).
Start/Stop Dictation
Currently there is a key sequence that cannot be changed in Talkatoo to toggle dictation.
CTRL+ALT+S
You can also show and hide Talkatoo using:
CTRL+ALT+H
To set Start/Stop to the Record button,
- Click the button with the ellipses to the right of Toggle Microphone (the default setting)
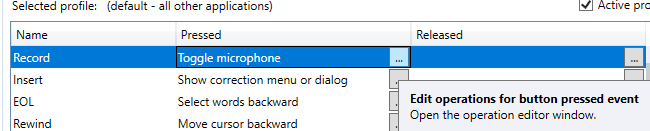
- Delete the existing command, by selecting 'Toggle Microphone' and clicking Delete
- Click Add, select Hotkey, and press Next
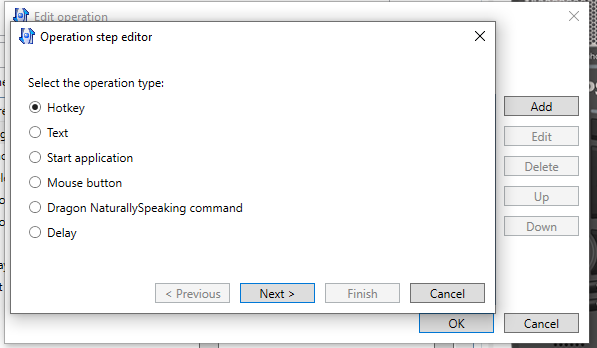
- Check the relevant Modifiers: in the case of Windows Alt and Control. Then click in the Key code identifier box, and press the S key on your keyboard (the order is not important).

- Press Finish, then OK
Below is a short animation (no sound) of the entire process.
This will configure it so that when you press record, it is like clicking on Start Dictation. Then when you are done speaking, you simply press it again to Stop Dictation.
If you would prefer to press and hold while you speak, and then let go simply do the same process under Released.
Note: If you are using the press and hold method, ensure you are holding the button down long enough for Talkatoo to finish the typing/adjustment process - usually 1-3 seconds after you finish speaking, depending on the length. - You can then perform the same process for any other keys you would like to have on the microphone, such as Enter, Tab or any shortcuts specific to your Practice Management Software. At a minimum, we like to set the following defaults:
Forward (The double arrow to the right): Enter - The new line character
Back (The double arrow to the left): Delete - Deletes one character with each press
Play (The play/pause button below record): Tab - Moves from one text field to the next. - To setup text macros using the microphone buttons, click here.
- IMPORTANT Once you have made all of your changes to the button configuration, you must click Apply on the top left.

If you don't, the changes will not take effect. - If you have multiple computers on which you would like to use this configuration, you can export the file and import it on the other computer.
- Close the Philips SpeechControl software with the x in the top right, and test it out. You should now be able to control Talkatoo, and any other buttons you configured.
- NOTE If you plan to use Talkatoo and the SpeechMike over a Microsoft Remote Desktop Connection, click here for additional required setup.
SpeechMike Air (wireless)
If you purchased the wireless SpeechMike Air, everything above will still apply to you, but there are a couple of additional things to know about how it works.
First, the Speechmike Air is not bluetooth. It connects through the dock that was included with it. The dock is both for pairing and for charging. There is a charging port on the bottom of the SpeechMike Air itself, but it will not work as a cabled microphone.
When you place the microphone in the dock, it will automatically charge. This is also how you re-pair the microphone to the dock if you use it on multiple computers.
Using a SpeechMike Air on multiple computers
There are a few options if you want to use the microphone on different computers:
- You could move the entire dock from computer to computer. Simply move the dock and the one USB cable to the computer, and plug it in.
- Purchase one dock for each station/location. This can be more convenient, especially if you are using it at different locations, such as at home, and the office. Then you only need to bring the microphone back and forth, drop it in the dock for 5 seconds and it will automatically pair.
- Purchase an "Air Bridge" which acts just like the dongle for a wireless mouse in that the microphone is paired to the Air Bridge and then you just move the Air Bridge from one computer to another (along with the microphone).
- Have a full microphone and dock for each computer. Arguably the most convenient, but also the most expensive option.
For both wired and wireless microphones, the settings, such as button configuration are not stored on the microphone, but rather on the computer. That means you would need to either configure them on each one, or you can export the configuration to a file, and then import it on each computer.
This is not an exhaustive list of all of the the functionality of the SpeechMike Premium series of microphones, rather some of the functionality we see commonly used. At this time, our support team is unable to assist with the setup of this method, however if you've already got it configured, or have a question, you can email support@talkatoo.com and we can try to help.