Setting up your new Dictation Microphone with Talkatoo
Talkatoo integrates directly with your SpeechMike or Olympus microphone.
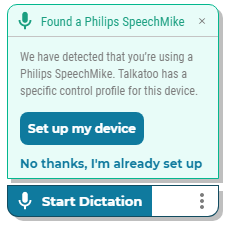
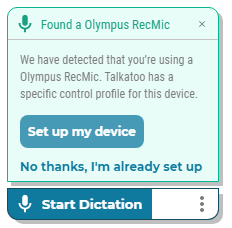
You'll see one of these pop-ups when connecting a SpeechMike or Olympus microphone. Click Set up my device to begin.
Already setup?
If you're an existing customer and your SpeechMike is already setup and configured, and you're happy with it, nothing has to change. On the pop-up above, simply click No thanks, I'm already set up next time you see it, and continue using your SpeechMike as you were.
New customer?
If you're new to Talkatoo, whether you're on Windows or Mac, you can just plug in your SpeechMike, and you'll see the message above. Click Set up my device, ensure the correct microphone is selected, and you'll be dictating in no time.
This article refers to using your handheld microphone and Talkatoo on the same computer. If you are using Microsoft Remote Desktop to connect to your computer at work, or the office's server, click here for more information.
Click Switch Device Profile
This will take you to the settings page. If it's not already selected, click the Microphone selection dropdown and select the desired microphone.
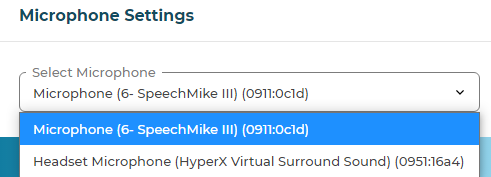
When you choose a SpeechMike or Olympus RM series as your microphone, you will see the steps below. Follow the steps shown to put your SpeechMike in the correct "Mode" to use with Talkatoo.
SpeechMike
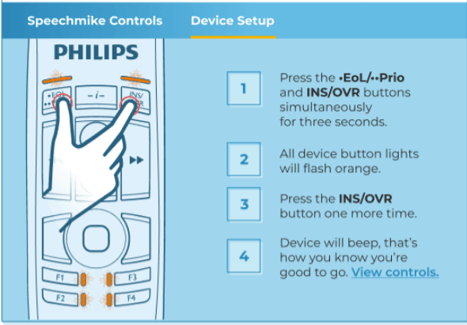
- Press the •EoL/••Prio button and the INS/OVR button simultaneously for three seconds. All of the lights will flash orange.
- Press the INS/OVR button once. It will beep and stay lit for 2 seconds indicating it is set correctly.
To check the mode your device is currently in:
Press the •EoL/••Prio button and the INS/OVR button simultaneously (for less than 3 seconds). The corresponding light will flash orange.- For direct integration with Talkatoo: INS/OVR should flash.
- For use with Philips SpeechControl software on Windows: F1 should flash
- For use with Philips SpeechControl software on Mac: EOL should flash
Olympus RM Microphone
All new Olympus microphones should now come in the correct mode, so there is usually no need to do this step.
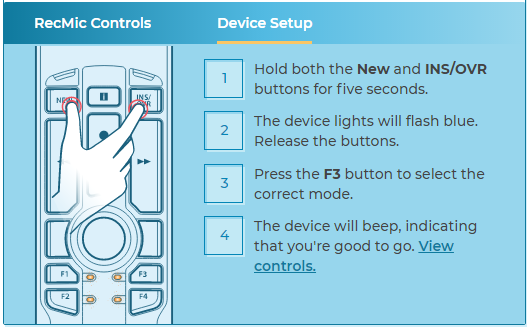
- Press the NEW button and the INS/OVR button simultaneously for five seconds. All of the lights will flash blue.
- Press the F3 button once. It will beep and stay lit for 2 seconds indicating it is set correctly.
To check the mode your device is currently in:
Press the New button and the INS/OVR button simultaneously (for less than 5 seconds). The corresponding light will light up blue.
- For direct integration with Talkatoo: F3 should flash.
Commands
The following buttons on the microphone control Talkatoo functions as listed: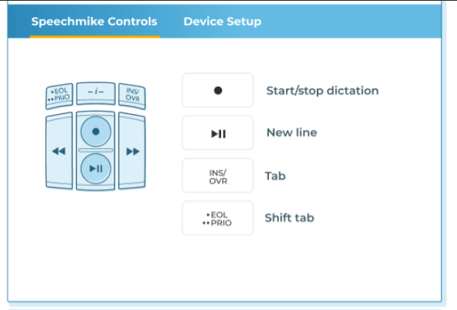 You can refer to the button configuration in the settings menu at any time to see how the buttons are configured.
 Start/Stop Dictation
 Enter / Return / New Line
 Tab
Tab
 Shift + Tab (Reverse Tab order)
The other buttons
While Talkatoo only uses the buttons on the microphone shown above at this time, there are functions associated with some of the other buttons you should be aware of. Below is the full list of commands and keypress-sequences that the microphone has in this mode:
|
Ctrl+Shift+Left Arrow: This will select the previous word from the cursor (or blank space if not immediately following a word). |
|
Ctrl+Shift+N: In some applications, such as a web browser, it will open a new window. |
 Function 1 Ctrl+Shift+D: Unassigned in most applications.
Function 2 Ctrl+Shift+T: Unassigned in most applications.
Function 3 Unassigned.
Function 4 Ctrl+Shift+H: Unassigned in most applications.
|
As this article outlines a new process for using Talkatoo, if you have any questions, discover a problem or are finding this process unclear, please reach out to our support department. We appreciate the feedback and want to ensure this process is simple for everyone to follow.

